snacks (les goûters ou gâteries)

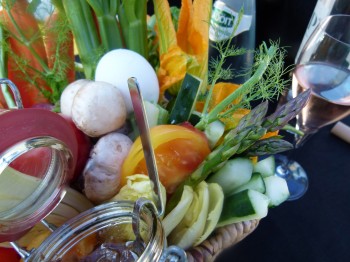
time for summer: panier de crudités avec anchoïade

May 26th, 2011


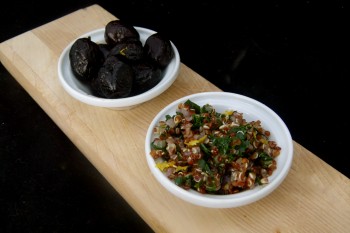
panier de crudités avec anchoïade

panier de crudités avec anchoïade


This Memorial Day weekend  get a jump on summer with a Provençal panier de crudités avec anchoïade. You will feel like you are on vacation at the Côte d’Azur and that is why it is this week’s “simple pleasure. Read the rest of this entry »


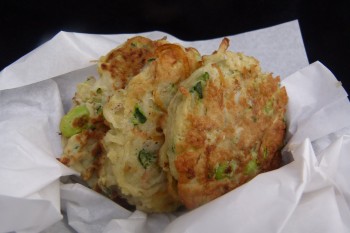
Spring vegetable pancakes

March 3rd, 2011

Spring vegetable pancakes

stats:

makes 8-10 pancakes

what you need:

1 tablespoon olive oil
1/4 cup finely minced fennel bulb
1/4 cup soybeans (fresh or frozen), shelled
1/4 cup spiral cut carrots (or grated)
1 cup grated potatoes, large grate with skins Read the rest of this entry »


power down power food: kale and quinoa tabbouleh

February 18th, 2011

power down power food:
kale and quinoa tabbouleh

You cannot separate what you do as a profession from who you are as a person.  I am a chef, a mother of two, and I run fifty miles a week.   I am not only passionate about cooking but food in general.  I believe that healthy food habits have healing, preventative, and restorative power.  Unhealthy food habits deteriorate our bodies and starve our minds.

When I am training for a marathon I try to make what I eat count a little more: more protein, leafy greens, and healthy carbs, and less foie gras and Valentine chocolate.  As a mother I am always looking for inventive ways to incorporate protein and greens into my childrens’ diet.  Two things in my “more” category are quinoa and kale; however, I have found that people often do not know what to do with either one when it comes to cooking.  It does not help that kale is usually stuffed on the bottom shelf in the produce aisle (hidden by other greens) and uncooked quinoa looks like bird seed.  To give you a little inspiration of how to use these two ingredients, this week’s simple pleasure is the combination of the two in a simple and delicious salad: kale and red quinoa tabbouleh.

Read the rest of this entry »


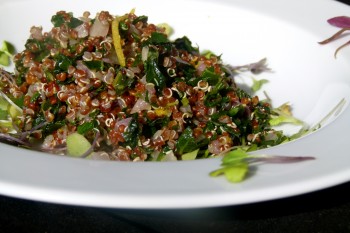
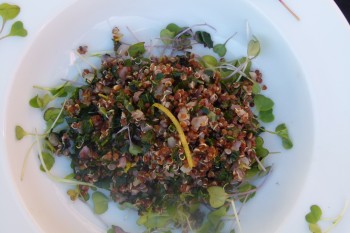
kale and red quinoa tabbouleh

February 18th, 2011

kale and red quinoa tabbouleh

stats:

serves 8-10

what you need:

1 cup red quinoa
1 1/2 cups water
1 teaspoon kosher salt

2 cups blanched kale (tuscan and curly), stems removed, finely chopped

1 red onion, diced brunoise
3 tablespoons fresh Italian parsley, minced
3 tablespoons finishing olive oil
2 tablespoons lemon zest
2 tablespoons fresh lemon juice
1 teaspoon fleur de sel (or as needed)
1/2 teaspoon Xérès or Spanish vinegar (Vinagre de Jerez)

how to:

  • Cook Quinoa.  Gently rinse quinoa until water is clear.  Bring salted water to a boil.  Add quinoa.  Simmer uncovered about 20 minutes until all of the water has been absorbed.  Remove from heat and cover with a lid.  Fluff quinoa with a fork and let it come to room temperature.   You will yield about 2 cups of quinoa.
  • Blanche Kale.  Place kale in a pot of salted, boiling water for 2 minutes (place a lid smaller than the pot or something equally heavy on top of the kale to submerge it if it rises above the water line). Remove kale from the boiling water and plunge in an ice bath.  Drain and dry well. Finely chop.  You should yield 2 cups.
  • Combine Ingredients. Combine kale, onion, parsley, olive oil, zest, lemon juice, salt, vinegar, and quinoa.
  • Adjust Seasoning.  Season to taste with salt (you may need more salt, depending upon how salty your quinoa water was).
  • Serve. Serve chilled.


game on: super snacks for Super Bowl

February 2nd, 2011

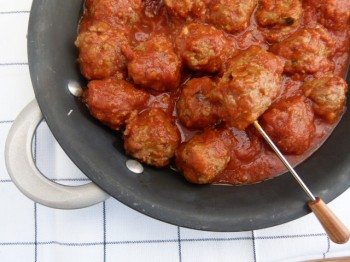
meatballs in pan on napkin superbowl

game on:
super snacks for Super Bowl


True, the extent of my involvement in the Super Bowl is feeding people.  I may not know who is playing or what is the score, but I do know if the food is a hit; what passed appetizers are incomplete; and which ones made it home. Read the rest of this entry »


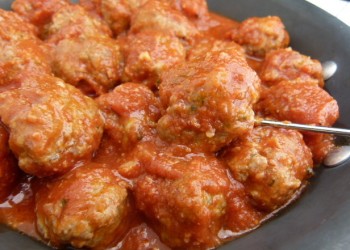
spicy veal meatballs with dates and bacon

February 2nd, 2011

spicy veal meatballs with dates and bacon

spicy veal meatballs with dates and bacon

yield:

makes approximately 50 meatballs (1/2 ounce each)

what you need:

1 tablespoon olive oil
3 garlic cloves, minced
2/3 cup onion, diced brunoise
1 tablespoon rendered duck fat
4 bacon slices, chopped and trimmed
1 pound ground veal  (or beef)
3 Medjool dates, pits removed and chopped
1 egg, mixed
2 tablespoon finely grated Parmesan
4 tablespoons fresh Italian parsley, minced
1/2 teaspoon piment d’espelette
1 teaspoon cayenne pepper
1/2 teaspoon ground cumin
2  teaspoons kosher salt (and as needed)
1 teaspoon freshly ground pepper (and as needed)

1-2 tablespoon olive oil
1/4 cup dry white wine
2 cups of Pomi strained tomato sauce
3/4 cup chicken stock

Read the rest of this entry »


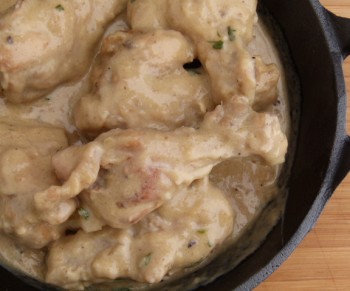
chicken drumettes simmered in beer with mustard sauce

February 2nd, 2011

chicken drumettes simmered in beer with mustard sauce

yield:

serves 12-14

what you need:

chicken

18-20 chicken drumettes (or 12-14 chicken legs)
kosher salt (as needed)
freshly ground black pepper (as needed)
all purpose flour  (as needed)

2 tablespoons unsalted butter
1/4 cup shallots, minced
1/4 cup apple cider vinegar

1 can (12 ounces) pilsner beer
1 cup chicken stock
1 bouquet garni (with fresh Italian parsley and 1 fresh bay leaf)

sauce

2 tablespoons honey
1 egg yolk
1 tablespoon Dijon mustard
1/4 teaspoon Tabasco
1/4 cup heavy cream
1 cup reduced cooking liquid

2 tablespoons fresh Italian parsley, minced

Read the rest of this entry »


green (bean) salsa

January 27th, 2011

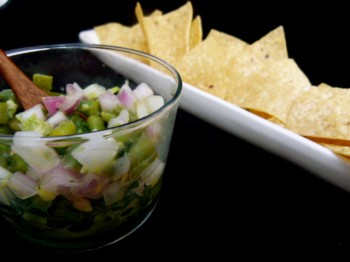
green (bean) salsa

salsa verte à ma façon
(green salsa my way)

Countdown to Super Bowl XLV.  Next week I will post a couple of meat dishes that you can serve and enjoy during the game which involve the things you typically think of when you think of Super Bowl food (meat, a little spice, a little sweet, and beer).  However, this week I wanted to give you something lighter so this week’s simple pleasure is salsa (with a twist).

In anticipation of the game, stores everywhere are displaying game snacks, primarily corn tortilla chips and salsa. Admittedly, fresh tomato salsa is delicious and a perfect companion to tortilla chips but tomato season ended in September and salsa in a jar is more like a sauce or purée, neither fresh nor  chunky.  However, salsa does not have to be made only with tomatoes.   This green salsa, salsa verte (à ma façon), takes the idea of a salsa but uses haricots verts (green beans) instead of tomatoes or tomatillos (which are used in the “salsa verde” found in Mexican/Mexican-American cuisine).

There are many varieties of green beans and their peak season is late summer/fall. However, in California the season for green beans is relatively long and there remain delicious green beans at the farmer’s markets and grocery stores (although I would consider this to be the very end of their season so buy them now).

Green beans, snap beans and string beans are all the same thing: green beans where both the pod and the small seeds inside are eaten.  Today we rarely see green beans with the string filament on them (which is where the name “sting bean” comes from) so the designation “string bean” is obsolete.  “Snap beans” is just another name given to green beans due to the snapping sound they make when broken.  Green beans varieties include Blue Lake, Green Daytona, and common snap beans.  What Americans know as “Haricots Verts” and identify as “French green beans” are simply beans picked early and thus, thinner and smaller in size than the common green bean varieties that this salsa calls for.

A couple of ingredient and production notes.  First, use a standard-size green bean that is round (not flat) and make sure it is green. The reason is visual as well as for taste.   The yellow varieties are pretty but they have less flavor than the green.  The purple varieties turn dark green when cooked and the bright green of the green varieties looks nicer in the salsa.

Second, you must use fresh, quality ingredients: fresh cilantro (coriander), fresh green beans (not frozen…they can be soggy), a tasteful, ripe avocado, a crisp red onion, and fresh lemon juice.  The benefit to this salsa is the light, fresh taste with the crunch of the onions and beans with the contrast of the creamy avocado.  If your ingredients are substandard or tasteless, so too will be your salsa.

Third, cook the green beans in salty water for no longer than 2-3 minutes and then immediately cease their cooking in an ice bath and drain them.  If  you overcook the beans or leave them to soak in water, they will not maintain the bright green color that you want and/or they will be mushy.

In addition to a tortilla chip companion, this salsa can stand on its own and pairs well with grilled, pan-fried, or roasted steaks, chicken, and seafood (shrimp, salmon, tuna, and sea bass, to name a few).  The salsa takes 10 minutes to make and tastes good the following day.  It is not only a delicious change from the usual routine, but the salsa is good for you too which makes salsa verte a touchdown for everyone.

Je vous souhaite un bon appétit !

LM

Read the rest of this entry »


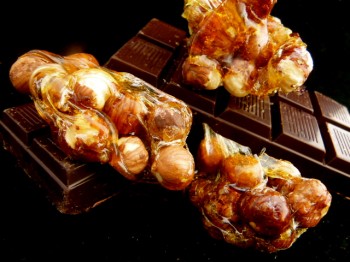
chocolate praline tartine … miam-miam !

January 13th, 2011


chocolate praline tartine … miam- miam !

One day last summer I taught a class as a guest chef for a children’s camp.  There were two featured ingredients and I was asked to teach the “campers” a few recipes with each ingredient.  In class, we discussed what other flavors paired well with our subject ingredients. When the topic of nuts arose, one camper asked if I knew how to make a certain chocolate hazelnut spread.  So that day we not only made our recipes with the featured ingredients, but we also made a chocolate-hazelnut spread which we added to some crêpes. The spread was a hit with all of the campers.

Ski season brings with it cold-nosed ski bunnies (of all sizes) with hungry tummies to match.  While hot chocolate is the customary snacking treat, it does not fill you up after you have been zipping down the slopes (and it is often made with a terrible powder, barely hydrated with water, and the result is usually not worth the styrofoam cup it comes in).   I thought about this spread and how a warm chocolate praline spread on crisp French bread would be the perfect alternative.  Easy and delicious, on the slopes or off, this week’s simple pleasure is a chocolate praline tartine.

In France, praliné is everywhere.  Praliné is a general term to describe sugar coated almonds (sometimes hazelnuts).  Whenever there is a fête (celebration) be it Bastille day or a seasonal food or flower festival, the elaborate candy carts roll in and with them come the praliné vendors (although praliné vendors are in Paris year round). Pâtisseries (pastry shops), including my favorite Pierre Hermé, add praliné to macarons as well as croissants, cakes, and brioche. In the States, “praline” is generally understood to mean sugar coated pecans with the addition of  butter and/or cream.  Unfortunately, there are as many poor renditions of pecan praline as there are instant hot chocolate,  so do not let that dissuade you from trying something new.

This spread is a combination of a hazelnut praline and chocolate with a little olive oil.  No cream or butter is added.  The spread takes 10-15 minutes to prepare and it stores for a long time in the refrigerator (assuming you can keep your family’s hands off of it).  It does solidify when cold,  because it contains no preservatives, but it only takes 1 minute in the microwave to revive it.

The spread is extremely versatile. In addition to tartines, you can pour the spread over a banana slice, apple wedges, pear slices, pineapple slices, orange slices (in the summer, strawberries).   You can put it in a fondue bowl and dip fruit (fresh or dried), marshmallows, graham crackers or bread sticks in it.  It is a delicious topping for ice cream or yogurt.  Pour it in the middle of a hot soufflé or use it as a crêpe filling (or to top your Sunday pancakes or waffles).   Honestly, you could simply eat it right off of your own fingers and you would be a “happy camper.”

A couple of production and ingredient notes.  First, if you do not have hazelnuts, almonds, pecans, walnuts, or macadamia nuts are excellent substitutes. Second, be very careful when cooking sugar (definitely not a time to cook with the baby in the Bjorn).  When the sugar reaches an amber color, it will be between 310 and 320 degrees Fahrenheit.  If you splash it on you, it will stick to your skin and burn you. Third, when cooking sugar, as the moisture is cooked out, the sugar becomes hotter, darker, and cooks quicker.  Turn down the heat when the sugar is thickening because when it gets close to an amber color, it will go fast and if you cook it too long it will turn bitter.

Lastly, when cooking (and cooling) sugar there is a potential for crystallization or “seeding.”  You do not want this.  This is when the sugar (sucrose) molecules seek out one another and bond, forming crystals.   It results in a gritty, sandy texture and if you have ever had Christmas fudge that tasted gritty instead of smooth, then you know what crystallization tastes like.

You can tell if your sugar had seeded because the bubbling sugar will take on a cloudy/chalky appearance.  Once seeding has begun, it will rapidly continue and you cannot recover from it.   To prevent it, make sure that there are no sugar granules on the interior sides of the saucepan (because sugar pieces on the side of the pan have no water to separate the molecules from one another they have the freedom to attach to one another and spread “the seed”, my slang).

I wrote the attached recipe to minimize the chance of seeding.  Placing a bowl on top of the saucepan creates condensation which will drip down the pan sides washing down any misbehaving sugar granules; however, do not leave the bowl on the pan too long or your sugar will not cook.  If you still have some granules on the pan sides, use a wet pastry brush to wipe down the sides.  Do not stir the sugar or otherwise dip the brush into the sugar; only use the brush to wipe down the interior sides of the pan.  Also, do not shake the pan while the sugar is cooking because the agitation can cause seeding (the movement will cause the sugar molecules to collide).  You can add some “inverted” sugar (i.e., a tablespoon of corn syrup or honey) to help prevent crystallization (inverted sugar is when the majority of the sucrose has been broken down into fructose and glucose and results in a syrup consistency which is only 1/4 sucrose).   However, if you follow the recipe as written and follow these tips, you will not need to add the inverted sugar.  Fifteen minutes of effort and your campers and ski bunnies will all say: “chocolate praline tartine …

miam-miam !” (yummy).

Je vous souhaite un bon appétit !

LM

Read the rest of this entry »
 

gingerbread dolls – delicious and fun

December 17th, 2010

gingerbread dolls

The holidays are a time when parents take multi-tasking to all new levels.  I have children myself so I am no exception.  In fact, I became very aware of my parental multi-tasking when during a lunchtime run I simultaneously collected mulberry tree trimmings for garland and table decor,  planned dinner menus and organized their execution in my head while at the same time listened to Selena Gomez (just to stay current on the music my children are listening to).   A woman, walking her dog, stared at me and her gaze made me conscious of how absurd I looked running with my large collection of mulberry branches in each hand, singing Selena Gomez songs.   The explanation “I’m a mom” immediately spilled from my mouth and she laughed.  She understood.  It is the final push before winter break and parents are scrambling to get everything done for the holidays before the children are home needing projects to do.   I have an answer to both (at least for one afternoon): gingerbread dolls.    An edible version of paper dolls, this project gives you your gingerbread for the holidays and the kids a project too.

While you can buy gingerbread kits in the stores, I have yet to find one that actually tastes good.  These gingerbread cookies are chewy and moist, crisp around the edges, spicy, but not too much, and hold their shape for decorating.   The recipe is simple and written with children in mind.   Instead of creaming the eggs and the butter, this basically uses a one step method (you can use a stand alone mixer or a food processor) which makes it not only easy for children but “child-proofs” the tendency to over-cream the sugar and butter, which causes the cookies to spread.   I have included two recipes: one written for adults (below); and the second written (with pictures) that a beginning reader can follow.

Once the cookies are made, rolled fondant is used to make the clothes.  Fondant can be purchased online and at cake supply stores and well as craft stores.   You can purchase it in a variety of colors but white can be easily colored by adding food coloring.  Although there is a fondant rolling pin it is not necessary for this project.   If the fondant is sticking simply use a little powdered sugar on your hands and rolling pin.   A pie cutter, a dull knife, kitchen scissors (or even a plastic play-dough cutter) can be used to tailor the clothing.   Spices, sprinkles and candies make nice accessories but let your child’s imagination be their guide.  Use royal icing (recipe posted) to adhere the clothing to the cookies or if the fondant dries the clothes will come off of the cookie (which can be good too if your cookie is a fashionista and wants to change her clothes).

A couple of notes on the ingredients.  This recipe uses both dark muscovado sugar and dark brown sugar.   Muscovado is unrefined sugar made from sugarcane juice which has a high molasses content.  It is a wonderfully spicy, moist and aromatic.   It adds a richness to the cookies that dark brown sugar alone cannot give you.  It also has small, dark bits of  molasses-sugar which adds character in appearance and taste (all gingerbread should have freckles as well as laugh-lines).  You can crush them for a more uniform look but the small bits do not affect the cookie adversely unless they are too big.   Do not use muscovado sugar exclusively for cookies or they will be too spicy.  You can eliminate it and use only dark brown sugar; however, do not use light brown sugar or the cookies will be plain and uninteresting (in taste and appearance).

Make sure your butter is room temperature (which means it is pliable but not too soft).  Cut it into chunks because you want to make sure it is incorporated with the other ingredients.

Molasses is the ingredient which gives gingerbread its character.  Molasses is the liquid byproduct of boiling sugarcane until the sucrose crystalizes to create granulated sugar.  There are three grades of molasses and the difference lies in which boiling (the first, the second, or the third) produced the molasses.  All grades can be sulphured or unsulphured.  Light molasses is produced from the first boiling, dark molasses from the second, and blackstrap from the third boiling.   The molasses I recommend using for these cookies is Grandma’s original unsulphured molasses (yes, the very same one our parents used when we were kids).  I have tried several, the organic ones, the darker molasses, and blackstrap, and while I use these others for spice cakes, they are too spicy for cookies.

Lastly, under-bake the cookies to achieve a chewy consistency. When small cracks in the cookies begin to form, take the cookies out of the oven and let the carry-over heat from the baking pan continue to bake the cookies for about 2-3 minutes.  Then place the  cookies on a metal rack to cool.  If you want crisp cookies, bake them longer, roll them flatter, and/or reduce the oven temperature slightly.   Store the cookies in an air-tight container for freshness and they should last a few days (assuming they are not eaten before then).

Simple.  Delicious.  Project!

Je vous souhaite un bon appétit !

LM

Read the rest of this entry »