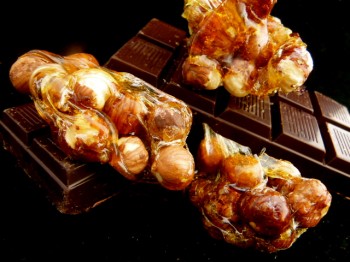
chocolate praline tartine … miam- miam !
One day last summer I taught a class as a guest chef for a children’s camp. There were two featured ingredients and I was asked to teach the “campers” a few recipes with each ingredient. In class, we discussed what other flavors paired well with our subject ingredients. When the topic of nuts arose, one camper asked if I knew how to make a certain chocolate hazelnut spread. So that day we not only made our recipes with the featured ingredients, but we also made a chocolate-hazelnut spread which we added to some crêpes. The spread was a hit with all of the campers.
Ski season brings with it cold-nosed ski bunnies (of all sizes) with hungry tummies to match. While hot chocolate is the customary snacking treat, it does not fill you up after you have been zipping down the slopes (and it is often made with a terrible powder, barely hydrated with water, and the result is usually not worth the styrofoam cup it comes in). I thought about this spread and how a warm chocolate praline spread on crisp French bread would be the perfect alternative. Easy and delicious, on the slopes or off, this week’s simple pleasure is a chocolate praline tartine.
In France, praliné is everywhere. Praliné is a general term to describe sugar coated almonds (sometimes hazelnuts). Whenever there is a fête (celebration) be it Bastille day or a seasonal food or flower festival, the elaborate candy carts roll in and with them come the praliné vendors (although praliné vendors are in Paris year round). Pâtisseries (pastry shops), including my favorite Pierre Hermé, add praliné to macarons as well as croissants, cakes, and brioche. In the States, “praline” is generally understood to mean sugar coated pecans with the addition of butter and/or cream. Unfortunately, there are as many poor renditions of pecan praline as there are instant hot chocolate, so do not let that dissuade you from trying something new.
This spread is a combination of a hazelnut praline and chocolate with a little olive oil. No cream or butter is added. The spread takes 10-15 minutes to prepare and it stores for a long time in the refrigerator (assuming you can keep your family’s hands off of it). It does solidify when cold, because it contains no preservatives, but it only takes 1 minute in the microwave to revive it.
The spread is extremely versatile. In addition to tartines, you can pour the spread over a banana slice, apple wedges, pear slices, pineapple slices, orange slices (in the summer, strawberries). You can put it in a fondue bowl and dip fruit (fresh or dried), marshmallows, graham crackers or bread sticks in it. It is a delicious topping for ice cream or yogurt. Pour it in the middle of a hot soufflé or use it as a crêpe filling (or to top your Sunday pancakes or waffles). Honestly, you could simply eat it right off of your own fingers and you would be a “happy camper.”
A couple of production and ingredient notes. First, if you do not have hazelnuts, almonds, pecans, walnuts, or macadamia nuts are excellent substitutes. Second, be very careful when cooking sugar (definitely not a time to cook with the baby in the Bjorn). When the sugar reaches an amber color, it will be between 310 and 320 degrees Fahrenheit. If you splash it on you, it will stick to your skin and burn you. Third, when cooking sugar, as the moisture is cooked out, the sugar becomes hotter, darker, and cooks quicker. Turn down the heat when the sugar is thickening because when it gets close to an amber color, it will go fast and if you cook it too long it will turn bitter.
Lastly, when cooking (and cooling) sugar there is a potential for crystallization or “seeding.” You do not want this. This is when the sugar (sucrose) molecules seek out one another and bond, forming crystals. It results in a gritty, sandy texture and if you have ever had Christmas fudge that tasted gritty instead of smooth, then you know what crystallization tastes like.
You can tell if your sugar had seeded because the bubbling sugar will take on a cloudy/chalky appearance. Once seeding has begun, it will rapidly continue and you cannot recover from it. To prevent it, make sure that there are no sugar granules on the interior sides of the saucepan (because sugar pieces on the side of the pan have no water to separate the molecules from one another they have the freedom to attach to one another and spread “the seed”, my slang).
I wrote the attached recipe to minimize the chance of seeding. Placing a bowl on top of the saucepan creates condensation which will drip down the pan sides washing down any misbehaving sugar granules; however, do not leave the bowl on the pan too long or your sugar will not cook. If you still have some granules on the pan sides, use a wet pastry brush to wipe down the sides. Do not stir the sugar or otherwise dip the brush into the sugar; only use the brush to wipe down the interior sides of the pan. Also, do not shake the pan while the sugar is cooking because the agitation can cause seeding (the movement will cause the sugar molecules to collide). You can add some “inverted” sugar (i.e., a tablespoon of corn syrup or honey) to help prevent crystallization (inverted sugar is when the majority of the sucrose has been broken down into fructose and glucose and results in a syrup consistency which is only 1/4 sucrose). However, if you follow the recipe as written and follow these tips, you will not need to add the inverted sugar. Fifteen minutes of effort and your campers and ski bunnies will all say: “chocolate praline tartine …
miam-miam !” (yummy).
Je vous souhaite un bon appétit !
LM


